This is an old revision of the document!
Table of Contents
This page is a work in progress
TODO:
- Upload images to Wiki rather than links (don't have permission)
- Add as many sections as possible to “Troubleshooting”
Magic Lantern Install Guide
Caution
- Read the entire guide before performing any steps.
- You are responsible for any damage done to your camera.
Install
- Connect the camera to a Windows 7/10 or Linux computer with a USB cable.
- Download mlinstall (https://github.com/petabyt/mlinstall).
- On Windows, extract the files and run the EXE. On Linux, you'll need to set the “.AppImage” file as executable. Here's a quick tutorial: https://discourse.appimage.org/t/how-to-run-an-appimage/80
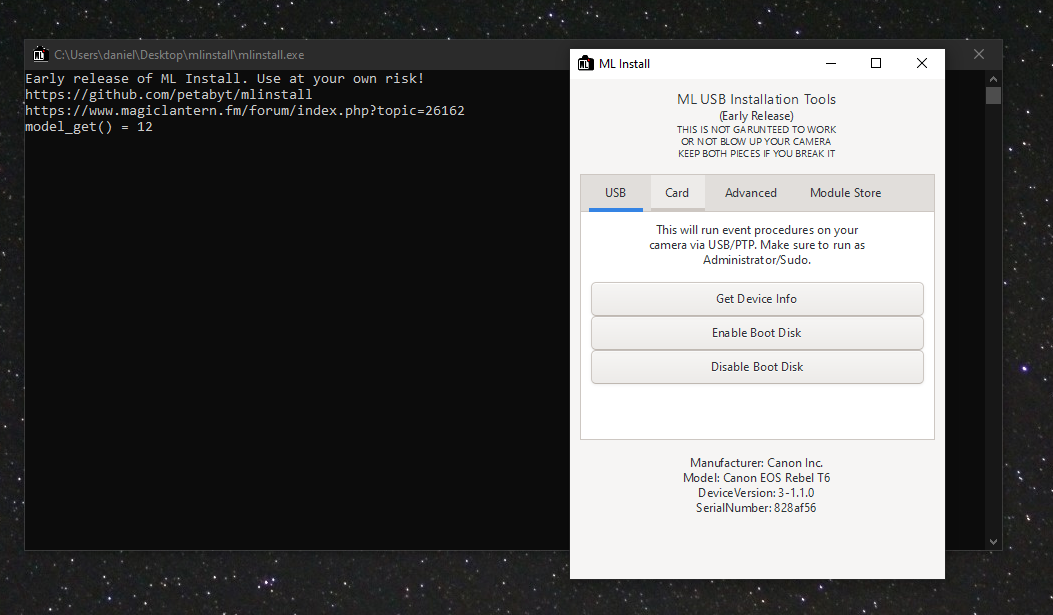
Here I click “Get Device Info” to see if it can detect the device.
On first run on Windows, it should not work. Here’s what to do:
- Download and run Zadig.
- On the Canon Camera device, replace “WinUSB” with “libusb-win32” as in this GIF: https://github.com/petabyt/mlinstall/blob/master/assets/zadig.gif
- In order to revert this change, simply repeat the steps and choose “WinUSB” instead of “libusb-win32”. Some Windows software may fail to work if this change is not reverted.
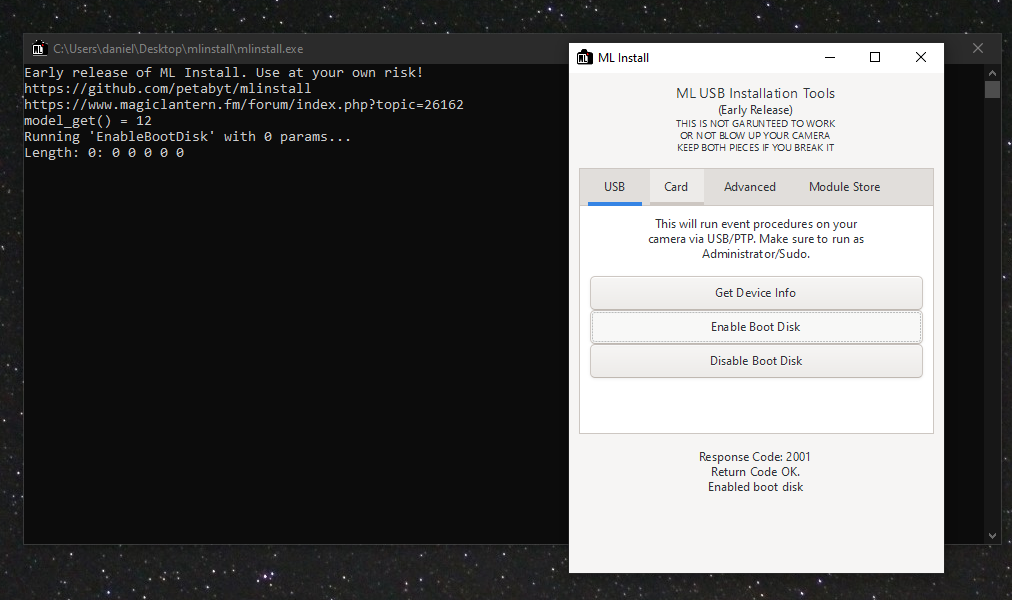
- Once you have verified that USB communication is working, click “Enable Boot Disk”.
- In order to revert the camera to factory settings, click “Disable Boot Disk”.
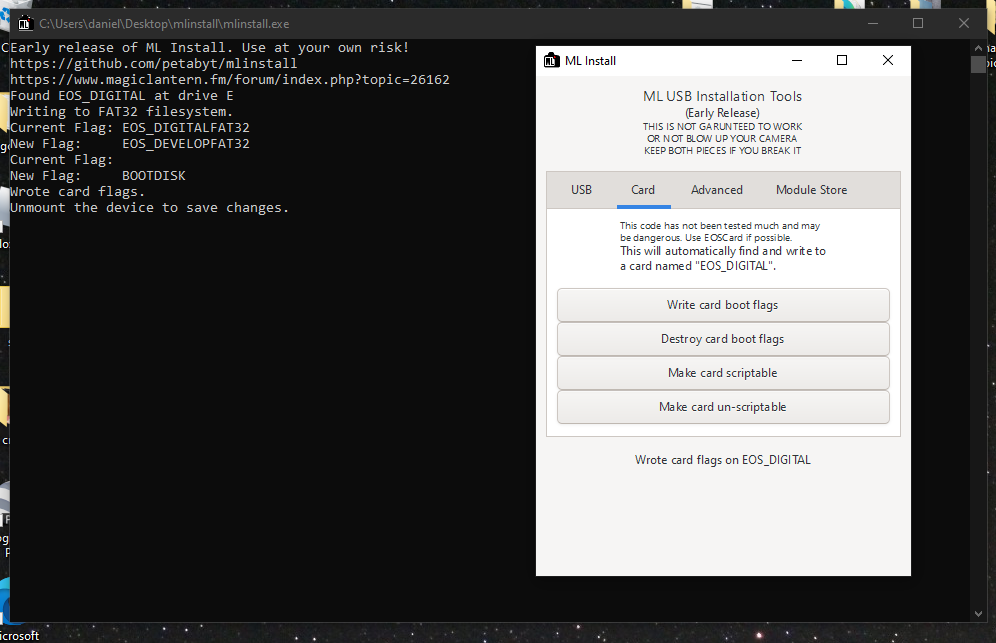
- Unplug the camera SD card from the camera.
- Insert the camera SD card into your computer. You might need an adapter.
- Ensure that your SD card is named “EOS_DIGITAL”. mlinstall searches for a storage device named “EOS_DIGITAL” and writes to the first one it finds.
- In mlinstall, navigate to the “Card” tab and click “Write card boot flags”. This will write data to the SD card. It’s a good idea to format the card in the camera first.
- In Linux, eject the card before removing it.
- Once you have written the card flags, you will need to download a build for your camera. Make sure that the model ID and firmware version of your camera matches the build. (you can check it in the Canon menu). You might need to downgrade or upgrade.
- Extract the Magic Lantern release zip file contents onto the SD card. Make sure that “autoexec.bin” and the “ML” folder are at the top directory, alongside DCIM.
https://eggnog.theres.life/f/47-sha7lft66sci8ncxr5fu7bxeluj1s3.png
- Insert SD Card into camera and turn it on. On first startup, ROM1 and ROM0 will be backed up. In the picture settings screen in MANUAL mode, press the Q button (or DELETE/TRASH button).
Uninstalling Magic Lantern
- Format the card (and back up any data first!)
- Run mlinstall again and click “Disable Boot Disk”.
Note that mlinstall has a “Destroy Card Boot Flags” feature that can make the SD Card non-bootable. (revert it to normal setting) After you run it, you will not need to format your card.
Troubleshooting, 1300D/Rebel T6
You may either have to downgrade or upgrade your firmware to a specific version. Here are some guides showing how to downgrade your firmware: https://magiclantern.fm/forum/index.php?topic=18941.0 https://www.magiclantern.fm/forum/index.php?topic=24926.0
critix: “Try to do a firmware update to version 1.1.0. (even if you have exactly this version on your device). Then you can try to test ML. This problem seems to exist on many devices. I suffered the same with my device. After an “update” to version 1.1.0, I was able to work on ML.”